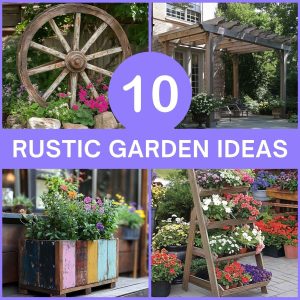
Rustic Garden Decor DIY Craft Ideas: Transform Your Outdoor Space With Handmade Charm
Ever wondered how to infuse your garden with the cozy, timeless appeal of the countryside without spending a fortune on expensive store-bought accents? The secret lies in embracing the spirit of rustic garden decor DIY craft ideas—a creative journey where weathered materials, personal effort, and a dash of imagination converge to craft an outdoor sanctuary that tells your unique story. This isn't just about decorating; it's about connecting with nature, practicing sustainability through upcycling, and surrounding yourself with pieces that possess soul and history. Whether you have a sprawling backyard or a modest balcony, these accessible projects will help you cultivate an atmosphere of relaxed elegance and organic beauty.
The allure of rustic style is its inherent imperfection and warmth. It rejects the sleek, manufactured look in favor of textures, natural hues, and materials that age gracefully. In a world of mass production, a handmade garden feature feels personal and authentic. Studies show a growing consumer trend towards sustainable and handcrafted home goods, with many people valuing the story behind an object as much as its aesthetics. By diving into these DIY craft ideas, you're not just beautifying your space—you're joining a movement towards mindful consumption and creative self-expression. This guide will walk you through a curated selection of projects, from simple afternoon crafts to weekend endeavors, all designed to bring the rustic charm of a French countryside garden or a cozy farmhouse porch to your own outdoor living area.
1. The Foundation of Rustic Charm: Working with Reclaimed Wood
Reclaimed wood is the cornerstone of authentic rustic garden decor, offering unparalleled character and an eco-friendly backstory that new lumber simply cannot match. Each knot, groove, and stain tells a tale of its past life—perhaps as a barn beam, a shipping pallet, or an old fence. This material forms the backbone for countless durable and beautiful garden features. The key to success is sourcing and preparing it correctly. Look for wood from reputable salvage yards, deconstruction sites, or even ask local contractors for leftover materials. Always inspect for rot, insect damage, or chemical treatments (especially from old pallets, which may have been treated with harmful chemicals). A good rule of thumb is to avoid any wood that feels spongy or has visible powderpost beetle holes.
Once you have your reclaimed treasure, proper preparation is non-negotiable. Start by giving it a thorough cleaning with a stiff brush to remove dirt and debris. For deeper cleaning, a gentle solution of mild soap and water works well. Sand the wood lightly to smooth out any dangerous splinters while intentionally leaving some rough patches for that authentic, weathered look. If you plan to use the wood for planters or any structure in direct contact with soil, you must seal it. Use a non-toxic, waterproof sealant like a penetrating tung oil or a plant-based deck stain to protect against rot and moisture. This step ensures your DIY creation lasts for seasons to come.
Craft Idea 1: The Rustic Garden Planter Box
A simple yet impactful project is a raised planter box. Using 2x4 or 2x6 reclaimed barn wood, construct a basic rectangular frame. For a truly rustic look, use simple butt joints secured with exterior-grade screws or even old-fashioned carriage bolts and nails. Leave the wood untreated or apply a light coat of stain to enhance the grain. The beauty is in the imperfections—let the varied lengths and widths of your boards create an intentionally uneven, charming silhouette. Line the inside with landscape fabric, add drainage holes, and fill with soil and your favorite herbs or flowers. This planter becomes a focal point, perfect for a patio or against a garden wall.
Craft Idea 2: Hanging Basket Stands and Garden Signs
Thin slats of reclaimed wood can be transformed into elegant hanging basket stands. Cut two identical "A-frame" shapes, secure them at the top with a hinge or a strong bolt, and attach a hook or small hoop at the apex to hang your basket. For a more decorative touch, use a wood-burning tool to carve the names of herbs, inspirational words, or simple floral motifs into a piece of reclaimed board to create a custom garden sign. Finish with a clear sealant, and stake it into the ground near your corresponding plants.
2. Embracing Industrial Rusticity: DIY Projects with Galvanized Metal and Tin
The cool, textured contrast of galvanized metal buckets, tubs, and sheets against soft greenery is a hallmark of modern rustic garden decor. This industrial material, once used for farming and storage, brings an unexpected touch of durability and patina to flower beds and porches. Its silvery-gray finish weathers beautifully over time, developing a soft, uneven sheen that complements natural wood and vibrant blooms perfectly. The best part? Galvanized metal items are often inexpensive to source from flea markets, farm sales, or even your own garage.
When working with tin or thin galvanized metal, safety is paramount. Always wear heavy-duty gloves and safety goggles to protect against sharp edges. Use tin snips for cutting, and a drill with metal bits for making holes. For larger projects involving sheet metal, a metal brake (a tool for bending) is incredibly helpful, but you can often achieve clean bends by clamping the metal to a sturdy edge and carefully hammering it over.
Craft Idea 3: Tin Bucket Herb Garden
This is perhaps the easiest and most charming rustic garden project. Simply gather a collection of old galvanized buckets or small washtubs. Drill several drainage holes in the bottom. You can leave them as-is for a pure industrial look, or use chalkboard paint to paint the front, labeling each bucket with the name of the herb planted inside—"BASIL," "MINT," "ROSEMARY." Group them on a sunny patio step or hang a few from a sturdy rustic beam using heavy-duty S-hooks. The metal helps keep soil slightly cooler in summer, and the uniform shape creates a cohesive, curated display.
Craft Idea 4: Galvanized Metal Garden Markers
Create durable, weatherproof plant markers by cutting strips of old tin roofing or a discarded metal sign. Use a permanent marker or a metal stamping kit to label each plant. For a more decorative option, cut the metal into the shape of the plant's leaf (like a basil leaf or a carrot top) and write the name on the flat part. Attach a wooden stake to the back with strong epoxy or small screws, and push it into the soil next to your vegetables or flowers.
3. Mason Jars and Glass: Capturing Light in the Garden
There's something profoundly nostalgic and magical about using simple glass mason jars in the garden. They act as tiny vessels of light, capturing the sun's glow during the day and housing flickering candles at night. Their clear or translucent quality makes them incredibly versatile, blending seamlessly with any rustic theme. This project category is perfect for beginners and requires minimal tools, making it an ideal starting point for your rustic garden decor DIY journey.
The beauty of mason jars lies in their adaptability. You can use them as is, paint them, distress them, or fill them with all manner of natural and crafted elements. For outdoor use, ensure you use jars with proper sealing lids if you are creating a closed terrarium, or leave lids off for open-air displays to prevent moisture buildup and potential cracking from temperature extremes.
Craft Idea 5: Mason Jar Lanterns
This classic project never loses its charm. Take a standard mouth mason jar and fill the bottom with a layer of small pebbles for drainage if using real soil. For a summer evening glow, add a battery-operated tea light or fairy lights inside. For a more dramatic effect, fill the jar with layers of colored sand, small seashells, or dried citrus slices and cinnamon sticks for a fragrant, decorative touch. Hang a series of these lanterns from a tree branch, a pergola, or a rustic shepherd's hook using sturdy wire or twine. They create a magical, starry-night atmosphere that is simply enchanting.
Craft Idea 6: Hanging Mason Jar Terrariums or Miniature Gardens
Create a suspended world by turning a wide-mouth mason jar into a tiny, self-contained garden. Layer small pebbles, activated charcoal (from a pet store, for filtration), potting soil, and then small, slow-growing plants like succulents or mosses. You can add miniature fairy garden figurines, a tiny twig fence, or a pebble pathway. Seal the lid if you want a closed terrarium (requiring no watering), or leave it off for an open dish garden that needs occasional misting. Hang these individually or in a cluster at varying heights to add a whimsical, living dimension to your garden wall or fence.
7. The Finishing Touch: Rustic Lighting and Final Flourishes
Lighting is the element that transforms your rustic garden from a daytime vista into a magical evening retreat. The goal is to create a warm, inviting glow that feels organic and unforced. Avoid harsh, modern spotlights. Instead, opt for fixtures that look like they've always been there. String lights are your best friend here. Look for edison bulb string lights or globe lights with a warm white glow. Drape them overhead along a fence, through tree branches, or around a pergola. For a more rustic look, replace the clear bulbs with amber-tinted ones.
Incorporate solar-powered rustic lanterns that look like old-fashioned oil lamps. Place them along garden paths, on steps, or clustered on a picnic table. You can even DIY your own by placing a solar light puck inside a vintage-style metal or glass lantern. Don't forget tiki torches with bamboo or metal stems for a casual, summery vibe. The key is to layer your lighting—use a combination of overhead string lights, pathway lanterns, and focal point torches to create depth and interest.
Final Flourish Ideas:
- Rustic Wreaths: Create seasonal wreaths using grapevines (a fantastic rustic material itself), twine, dried grasses, pinecones, and berries. Hang them on garden gates, shed doors, or even on the wall of your house overlooking the garden.
- Natural Rope and Twine Details: Use jute, sisal, or manila rope to tie back plants, create simple macramé hangers for pots, or wrap around jar lids for added texture. A ball of twine in a small wooden bowl is decor in itself.
- Vintage Finds as Planters: An old, rusted wheelbarrow, a broken-down wooden chair (with the seat removed to hold plants), or a set of mismatched, chipped enamelware pots all add instant character and a sense of history.
Conclusion: Your Rustic Garden, Your Masterpiece
Creating a rustic garden through DIY crafts is a deeply rewarding process that yields far more than just a beautiful space. It fosters a connection to the materials, teaches new skills, and results in a environment that is uniquely, undeniably yours. The projects outlined—from the foundational work with reclaimed wood and galvanized metal to the whimsical touches of mason jars and natural elements—provide a comprehensive toolkit for transforming your outdoor area. Remember, the essence of rustic style is not perfection, but authenticity and warmth. Embrace slightly uneven cuts, the natural warping of wood, and the gentle patina of age. Start with one small project, like a tin bucket herb garden or a set of mason jar lanterns, and let your confidence and creativity grow. As you gather materials and bring your ideas to life, you'll find that your garden becomes a living scrapbook of your efforts, a sanctuary that nourishes both plants and the soul. So, roll up your sleeves, source some reclaimed treasures, and begin crafting the rustic garden of your dreams—one handmade piece at a time.